


System 32-40 spring return roller blind fitting operating instructions

Fitting the Blind
Carefully unwrap the blind from its wrapping.
Then check the brackets as these could be a different style for each end.
The brackets are universal and can be fixed in a top, faced or side fixed position.
Fitting the Brackets
Measure the fabric width of the roller blind and place your bracket 35mm (1.375”) wider than this measurement with two screws in each bracket, making sure the brackets are correct for that side of the blind and are level.
Fitting the Blind mechanism without a stop
The spring end is normally on the left side and with the fabric rolling from the back of the blind.
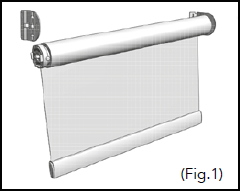
With the blind rolled in the upper most position push fit the blind into the opposite end bracket from the spring. (Fig.1)
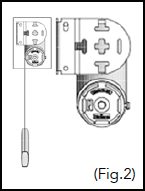
Then making sure the locating lugs on the end of the spring side is in the lowest position, (Fig. 2) place the blind into the spring end bracket.
Release the pin (do not pull all the way out) from the front side of the spring. Your blind has been pre-tensioned and is now ready to operate. (Fig.3)

Fitting the Blind mechanism with a stop
The spring end is normally on the left side and with the fabric rolling from the back of the blind.
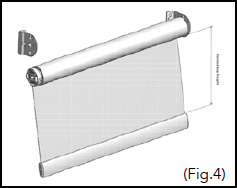
With the blind rolled in the upper most or at the desired top height position, push fit the blind into the stop end which is opposite end bracket from the spring. (Fig.4)
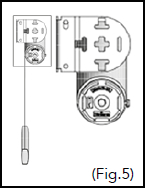
Then making sure the locating lugs on the end of the spring side is in the lowest position, place the blind into the spring end bracket. (Fig.5)
Release the pin (do not pull all the way out) from the front side of the spring.
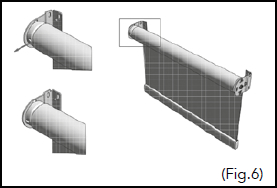
Your blind has been pre-tensioned and is now ready to operate and will stop at the desired top position. (Fig.6)
Lost Tension on the Spring
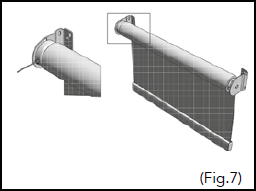
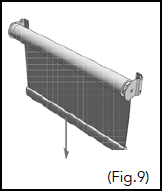
If you have lost all the tension on the blind, ensure the front locating pin is IN (Fig. 7).
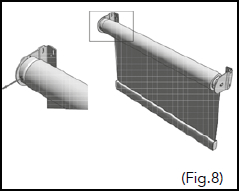
Gently remove the blind from the brackets and roll back up by hand, then replace it back into the brackets AND RELEASE THE PIN (Fig.8) and pull down to the drop, (Fig 9) then test to see if the blind returns to the top, if not pull the blind down and lock off, DEPRESS THE LOCKING PIN AND gently remove the blind and roll up by hand. Replace back into the brackets and test again with the locating pin at the front, REMEMBERING TO RELEASE THE LOCKING PIN BEFORE OPERATION.
Note: Once tension is applied to the blind DO NOT remove the SR unit from the tube without releasing tension.
Lost Top Position on the Blind
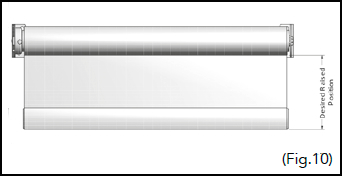
If your blind has a top stop in it and you lose the position of the top stop and the fabric is not stopping at the desired raised position and it is not raising high enough continuing going round the tube, it can be reset.
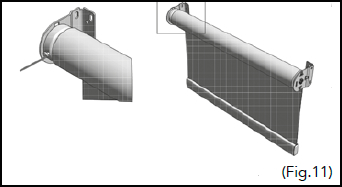
To reset, lock the blind at the desired raised position then insert the locking pin into the spring. (Fig.10 & Fig. 11)
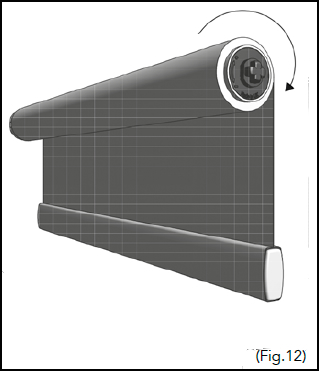
Removing the blind from its brackets, then turn the idle end pin of the blind in a clockwise direction until it stops (Fig. 12)
Then replace blind into the brackets and release the locking pin and operate as normal.
Warning
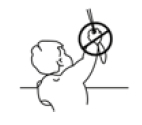
Young children can be strangled by loops in pull cords, chains, tapes and inner cords that operate the product.
To avoid strangulation and entanglement, keep cords out of the reach of young children. Cords may become wrapped around a child’s neck.
Move beds, cots and furniture away from window covering cords.
Do not tie cords together. Make sure cords do not twist and create a loop.